Build a top-down level from AI tilesets (Godot 4 and Unity)
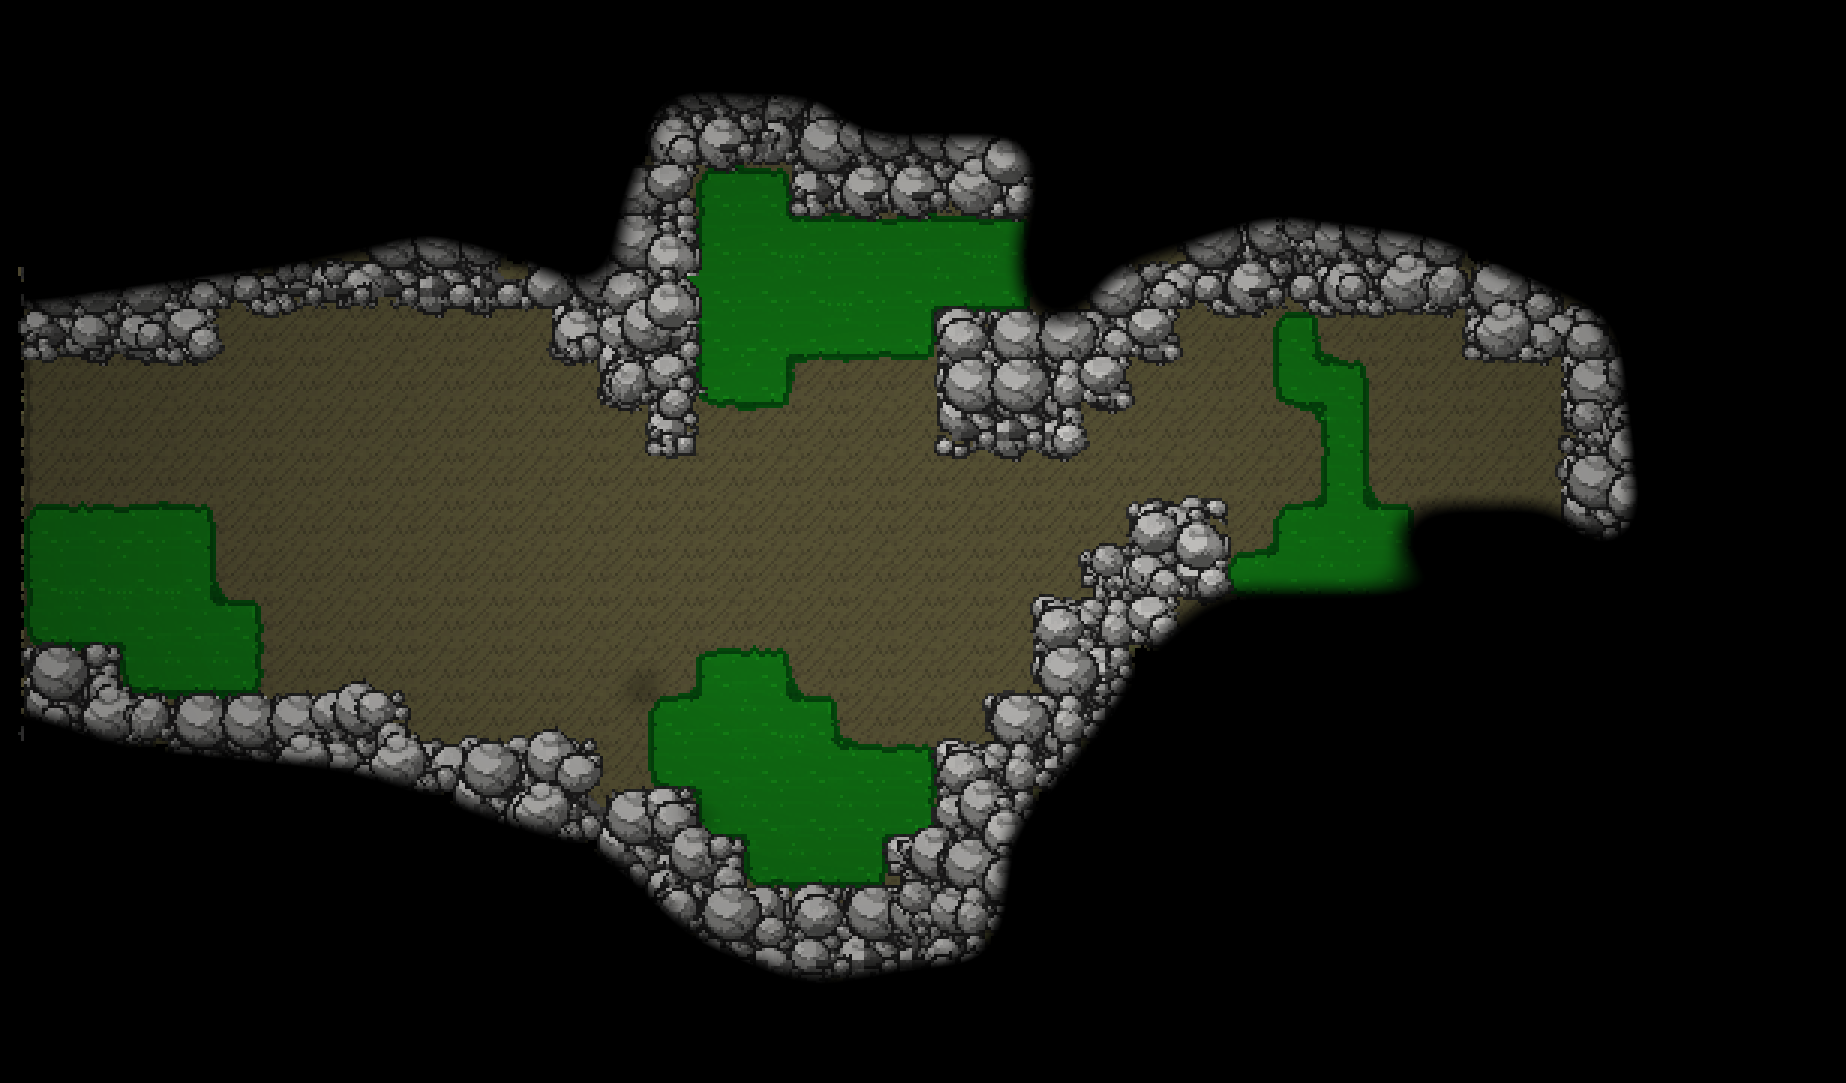
A question we get a lot: "how do I make a tile map like an old top-down MMO?" The answer is that you don't generate the map. You generate tilesets, one per ground type, and paint the map in your engine. This guide builds a small cave (dirt floor, slime pools, boulder walls) from three prompts, with the exact settings, and takes it into Godot 4 and Unity.
Why tilesets, not a map picture
A single generated picture of a level looks fine until you need to change it, add collision or make a second room. A tileset is one material with all of its edge and corner pieces, so the engine can paint any shape and the edges join on their own. Three tilesets give you unlimited caves.
The same recipe works for any top-down level. Swap the prompts: grass, water and treetops for an overworld; sand, lava and rock for a volcano; floorboards, carpet and crates for an interior.
Step 1: make three tilesets
Open Tileset from the mode picker. Every set below uses Quality Epic, Style Pixel art, Projection Top-down and Tile size 16px. Pick one tile size and keep it for every set in the level.
The ground: dirt floor
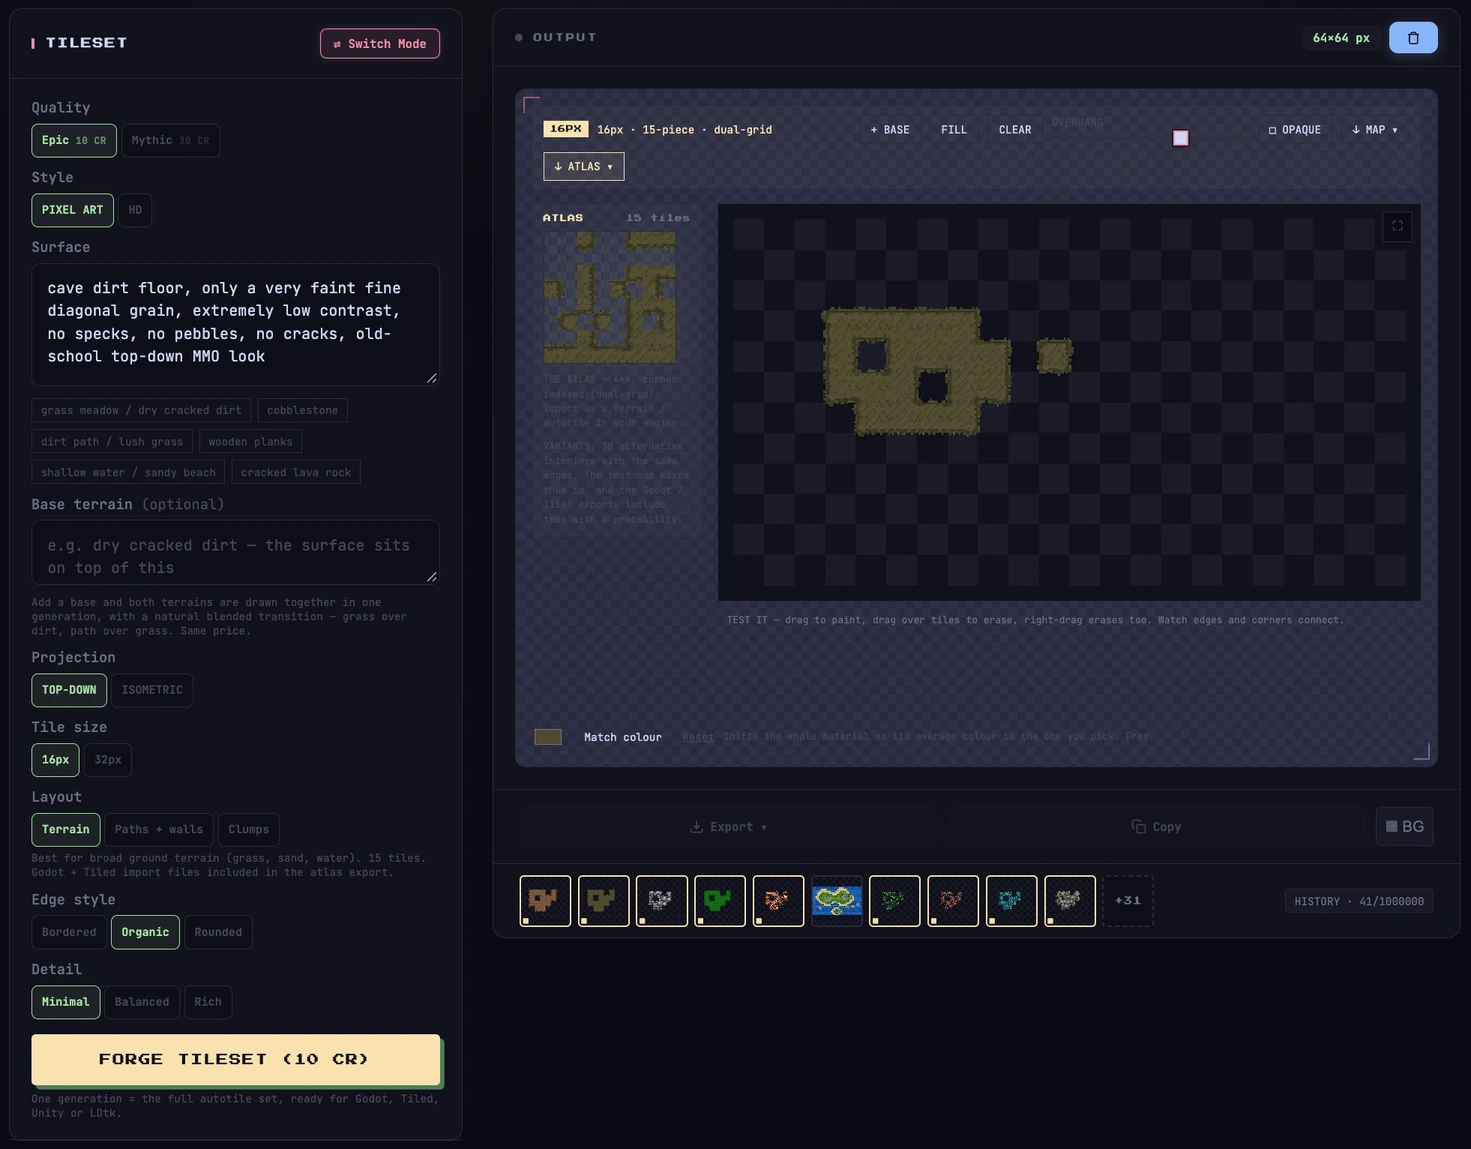
- Layout Terrain, Edge style Organic, Detail Minimal.
- Prompt: cave dirt floor, only a very faint fine diagonal grain, extremely low contrast, no specks, no pebbles, no cracks, old-school top-down MMO look
- When it finishes, click the colour swatch under the result, pick the colour you want (we used
#4f4a30) and press Match colour. It's free and shifts the whole material to that colour, which is the easy way to make several sets sit together.
Ground that covers most of the screen should be quiet. Ask for low contrast and say what you don't want; busy floors fight with the characters standing on them.
The liquid: slime pools
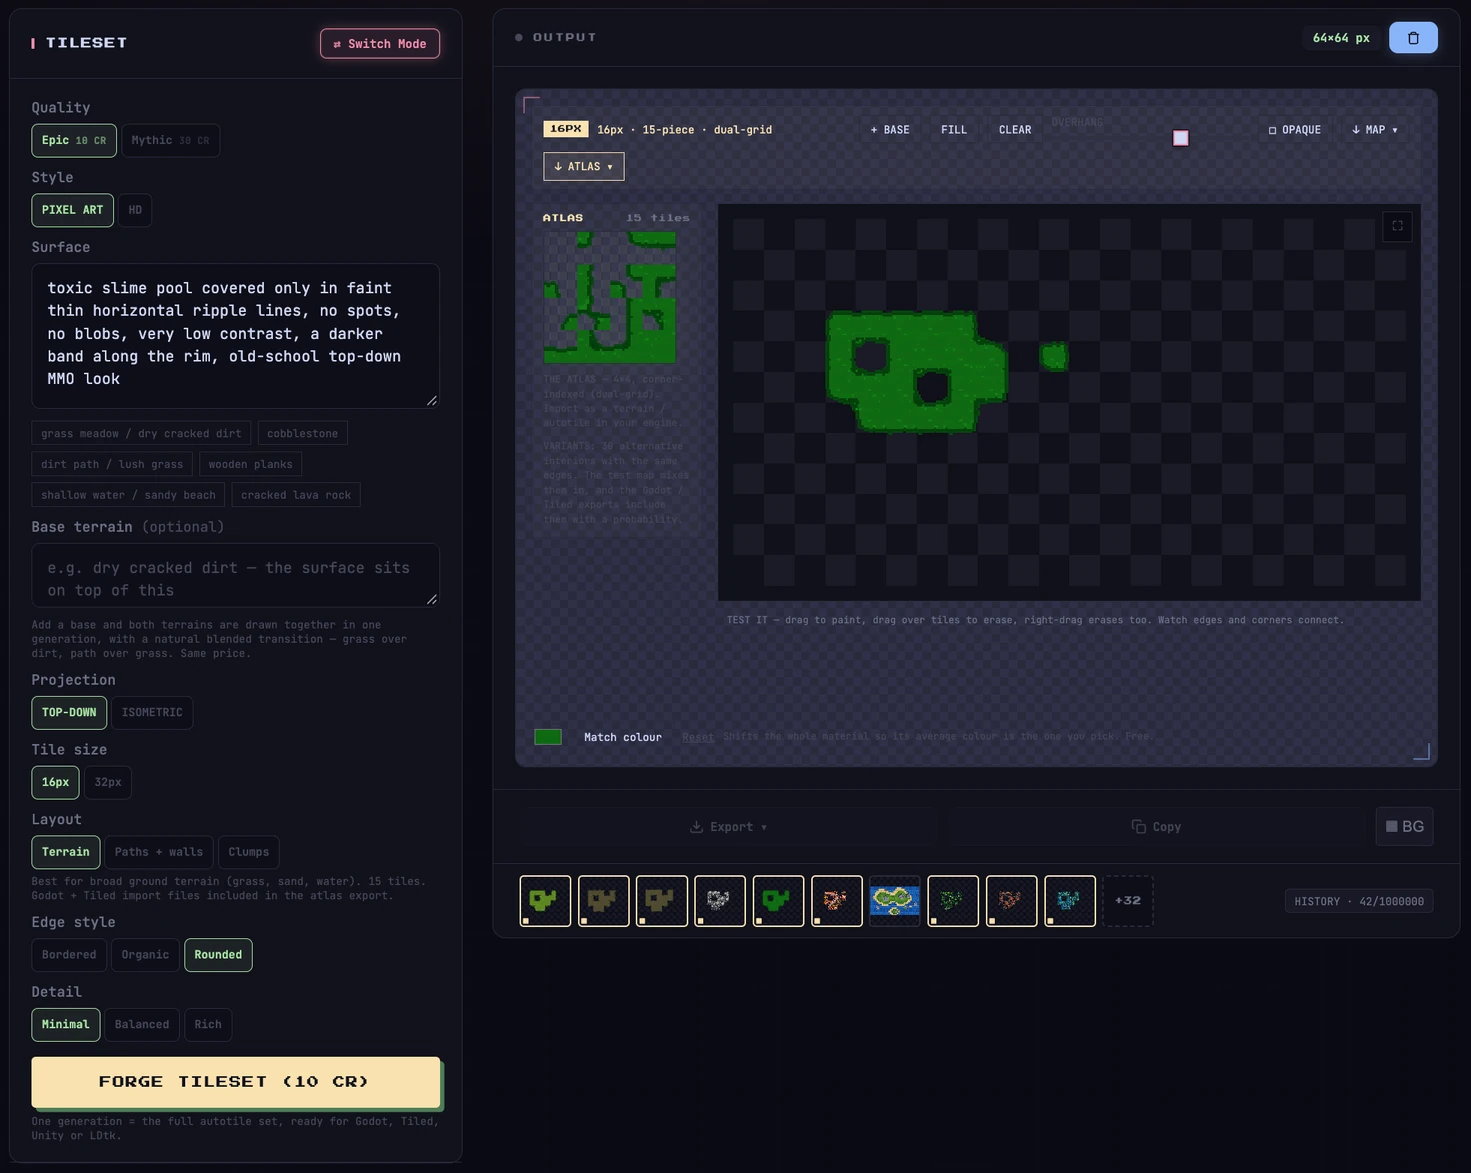
- Same settings, but Edge style Rounded. Rounded gives a pool a soft shoreline instead of square steps. Use it for water, lava, slime and mud.
- Prompt: toxic slime pool covered only in faint thin horizontal ripple lines, no spots, no blobs, very low contrast, a darker band along the rim, old-school top-down MMO look
- Match colour:
#0f6a12.
The walls: boulders
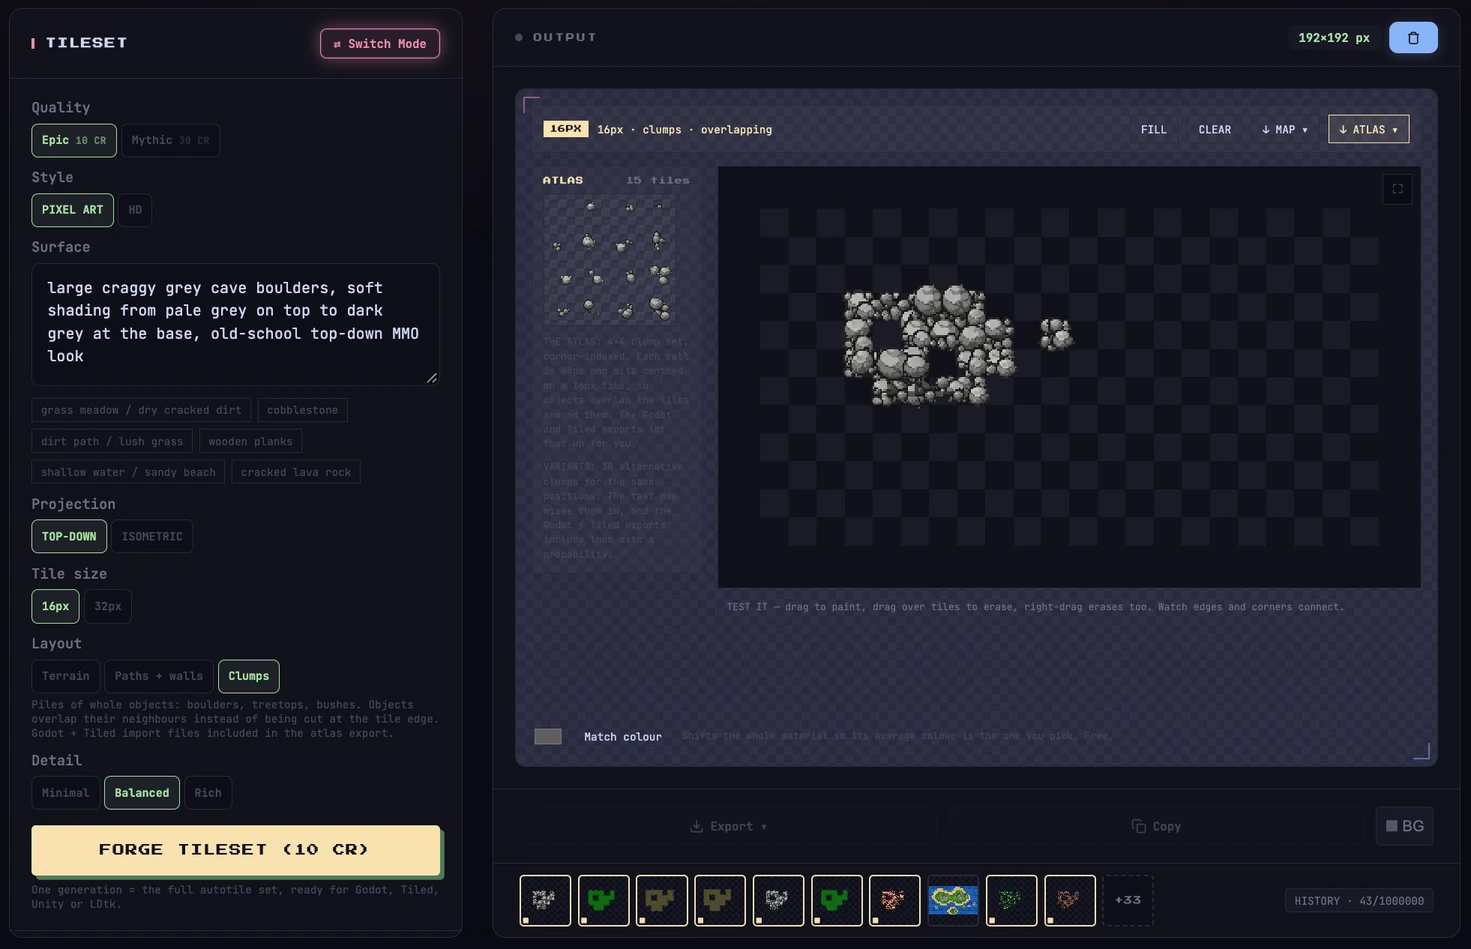
- Layout Clumps, Detail Balanced.
- Prompt: large craggy grey cave boulders, soft shading from pale grey on top to dark grey at the base, old-school top-down MMO look
Clumps is for anything made of big separate objects: boulders, treetops, bushes, rubble. Each tile is a group of whole objects that overlaps the tiles next to it, so nothing gets cut in half at a tile edge and the grid disappears.
Test it, then export
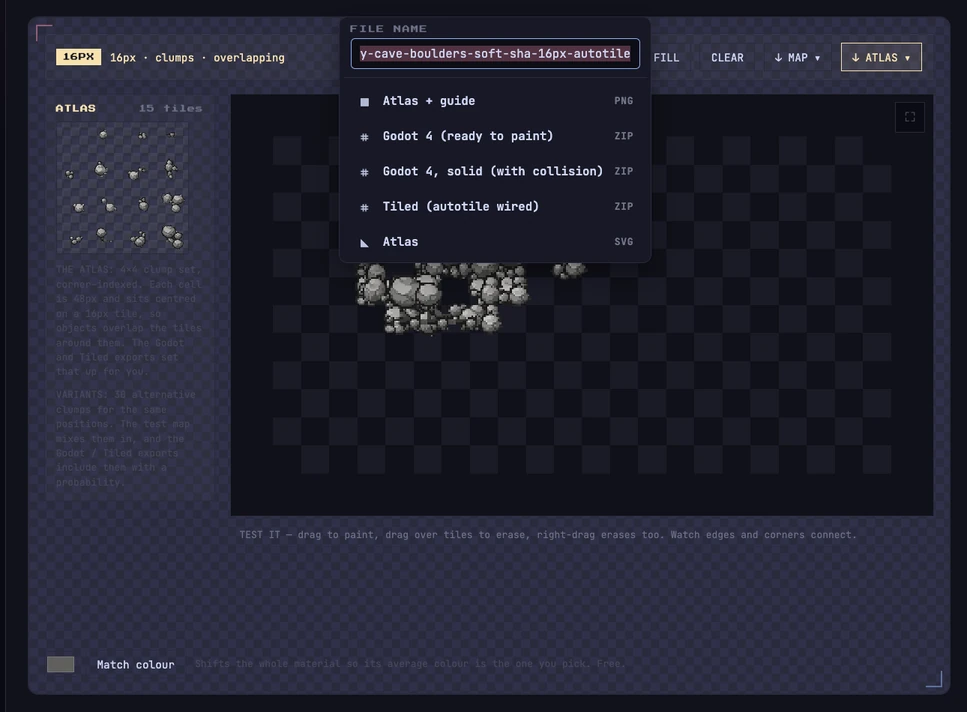
Drag on the test map to paint and erase. It behaves the way the engine will, so if the edges look right here they will look right in your game. If a set isn't right, reroll it before you export. Then press ATLAS and pick your engine. Each export is one zip.
Step 2: Godot 4
You need Godot 4.3 or newer (the exports use TileMapLayer). The screenshots are the 4.7 editor building this level, in order.
Bring the files in
- For each tileset press ATLAS and choose Godot 4 (ready to paint). For walls choose Godot 4, solid (with collision) so characters can't walk through them.
- Unzip and drag the folders into your project, anywhere you like. Each folder has the atlas, the tile set, a ready-made layer scene and a short README.
- Make a new 2D scene and drag
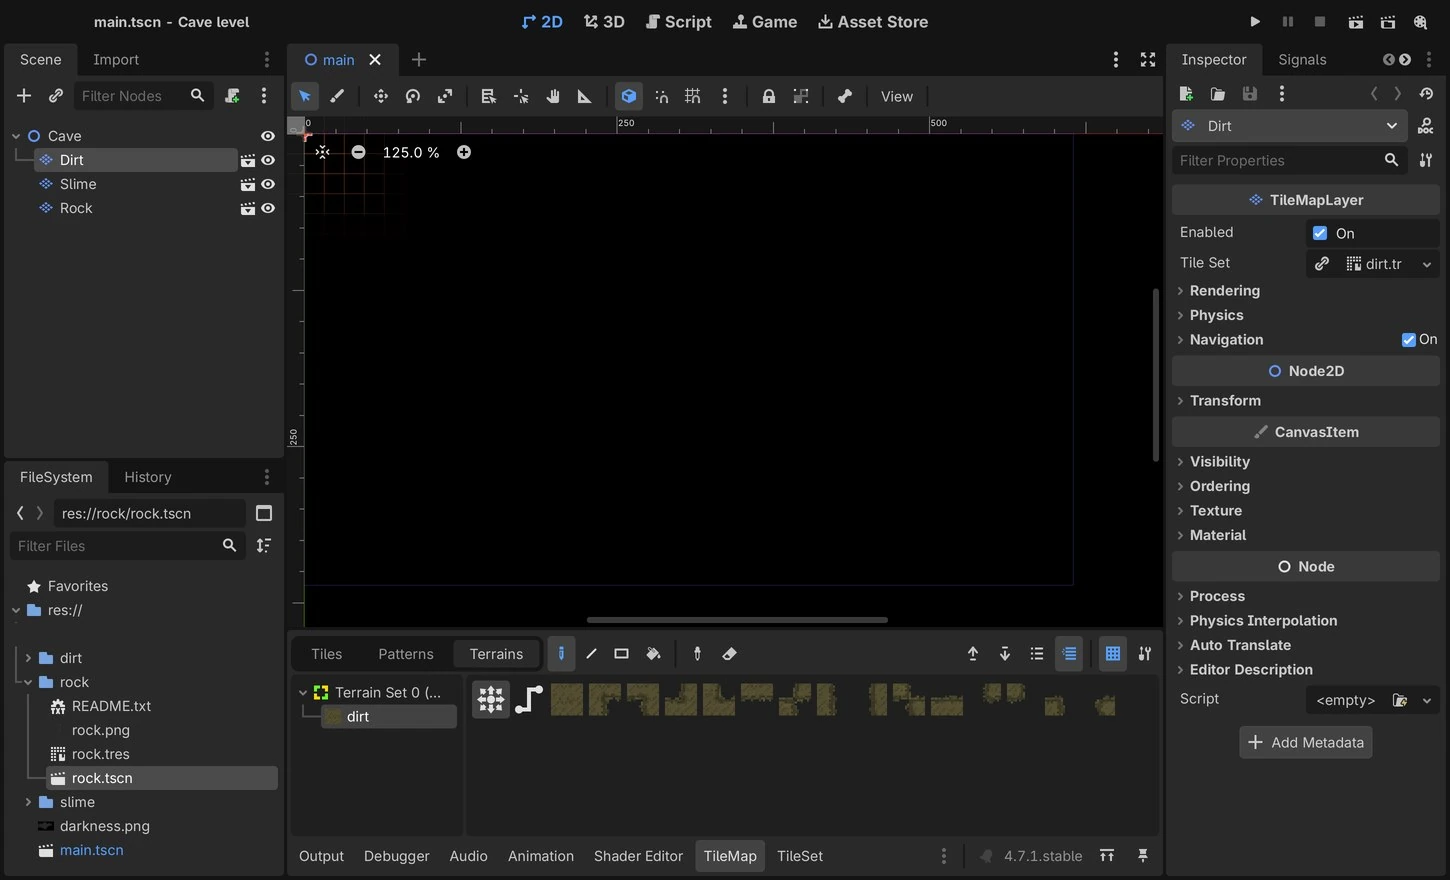
dirt.tscn,slime.tscnandrock.tscninto it, in that order. Each is a TileMapLayer with its Tile Set already loaded and pixel filtering already on. Lower in the list draws on top. - For a cave, set Project Settings > Rendering > Environment > Default Clear Color to black.
- Click a layer. The TileMap panel opens at the bottom. Open the Terrains tab and pick the terrain under Terrain Set 0. That is your brush.
Paint the ground
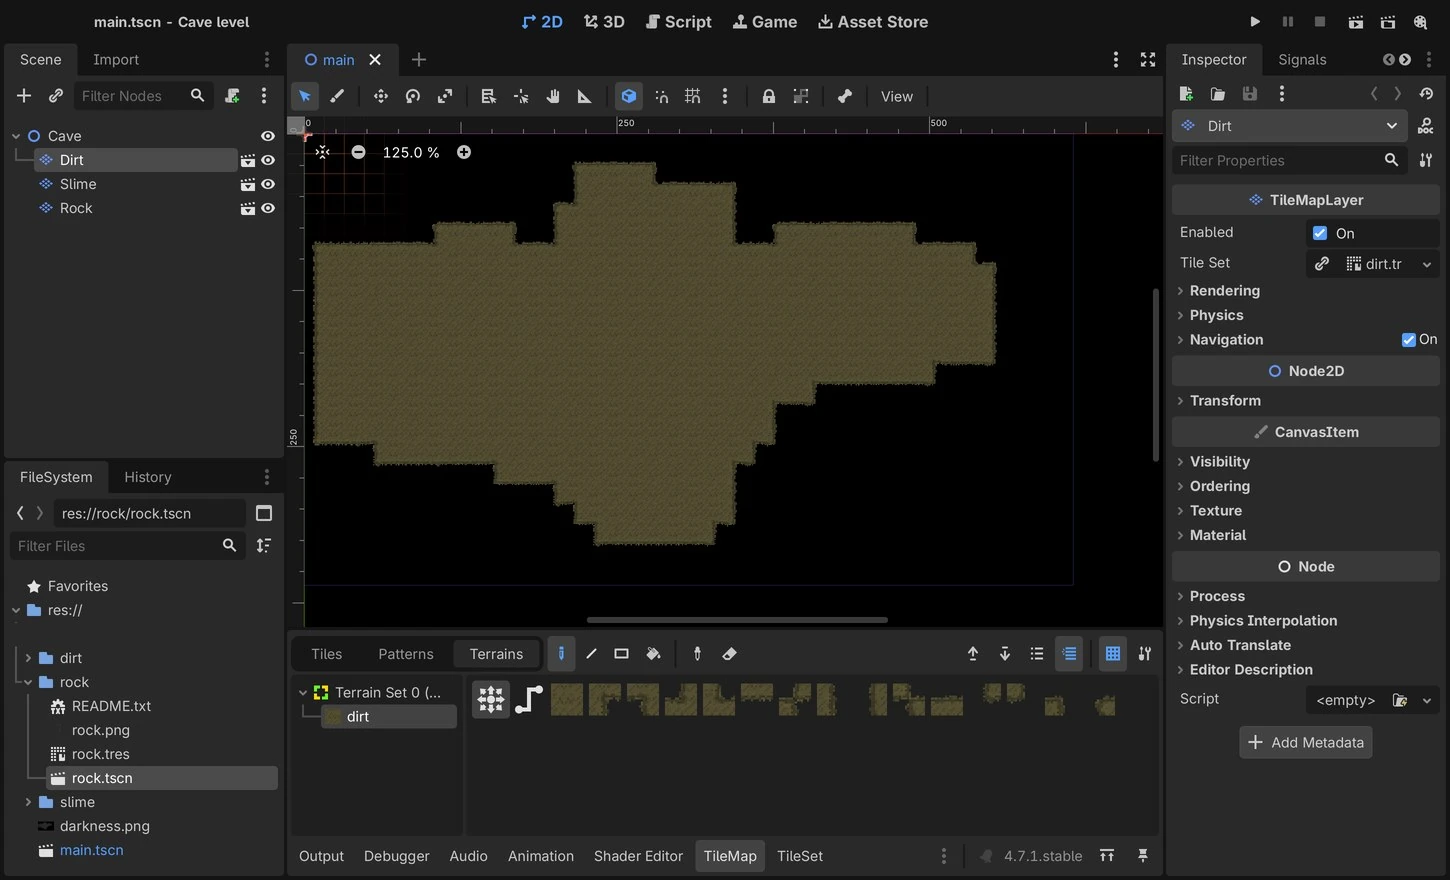
Select the dirt layer and paint the whole floor with the brush or the rectangle tool, including the area the pools and walls will sit on. Godot picks the right edge and corner pieces as you go.
Paint the pools
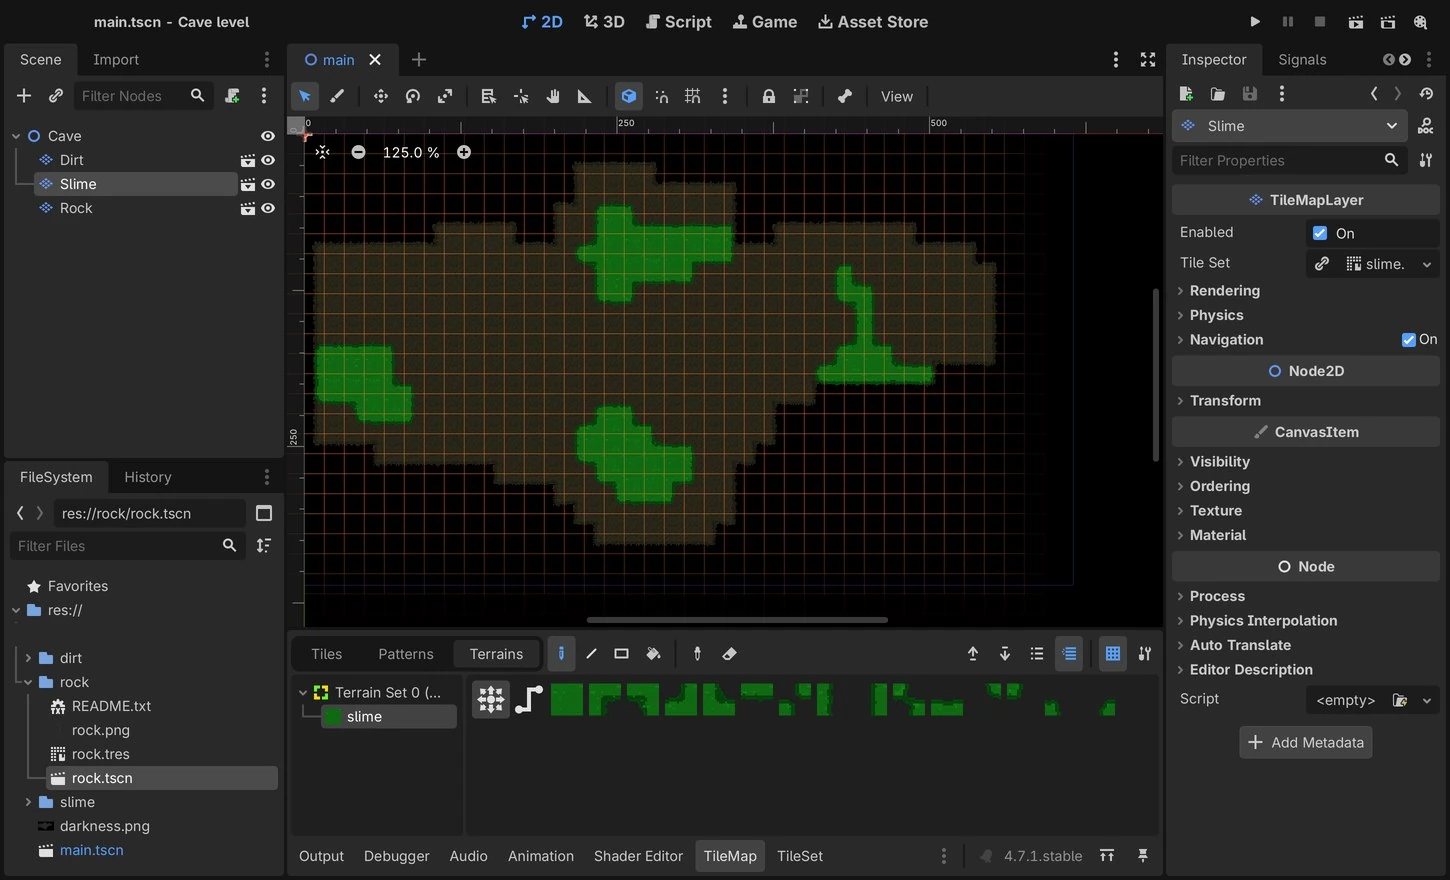
Select the slime layer and paint pools on top of the dirt. The rounded shoreline comes from the tileset.
Paint the walls
Select the rock layer and paint walls round the edge of the floor. The boulders overlap each other and spill a little past their tiles, which is what hides the grid.
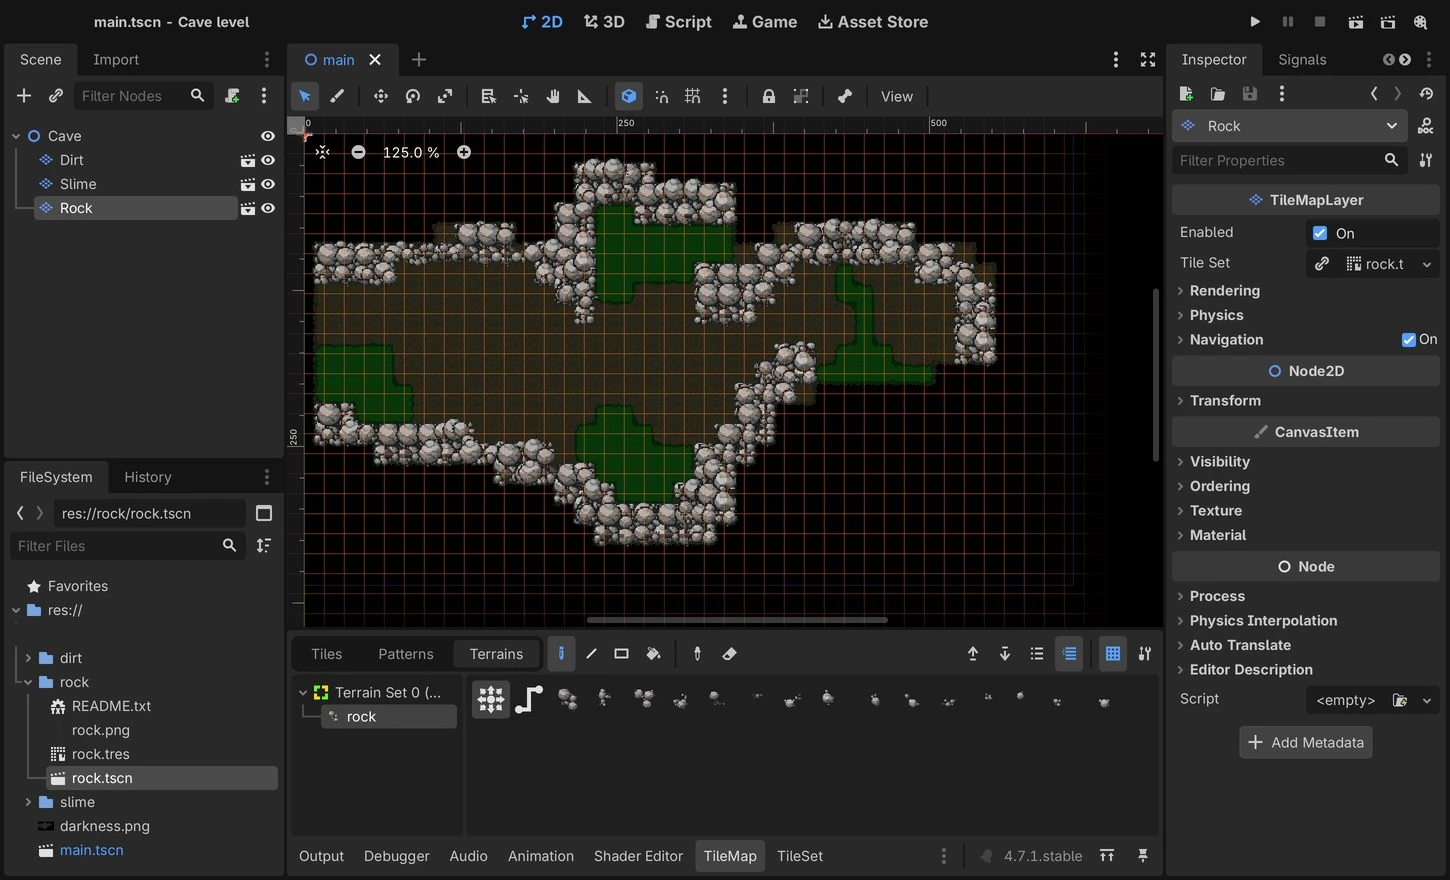
Add the darkness
The simple way: a black image with a soft-edged hole where the cave is, added as a Sprite2D on top of everything. If you want the light to follow the player, use a CanvasModulate set to black and a PointLight2D on the player instead.
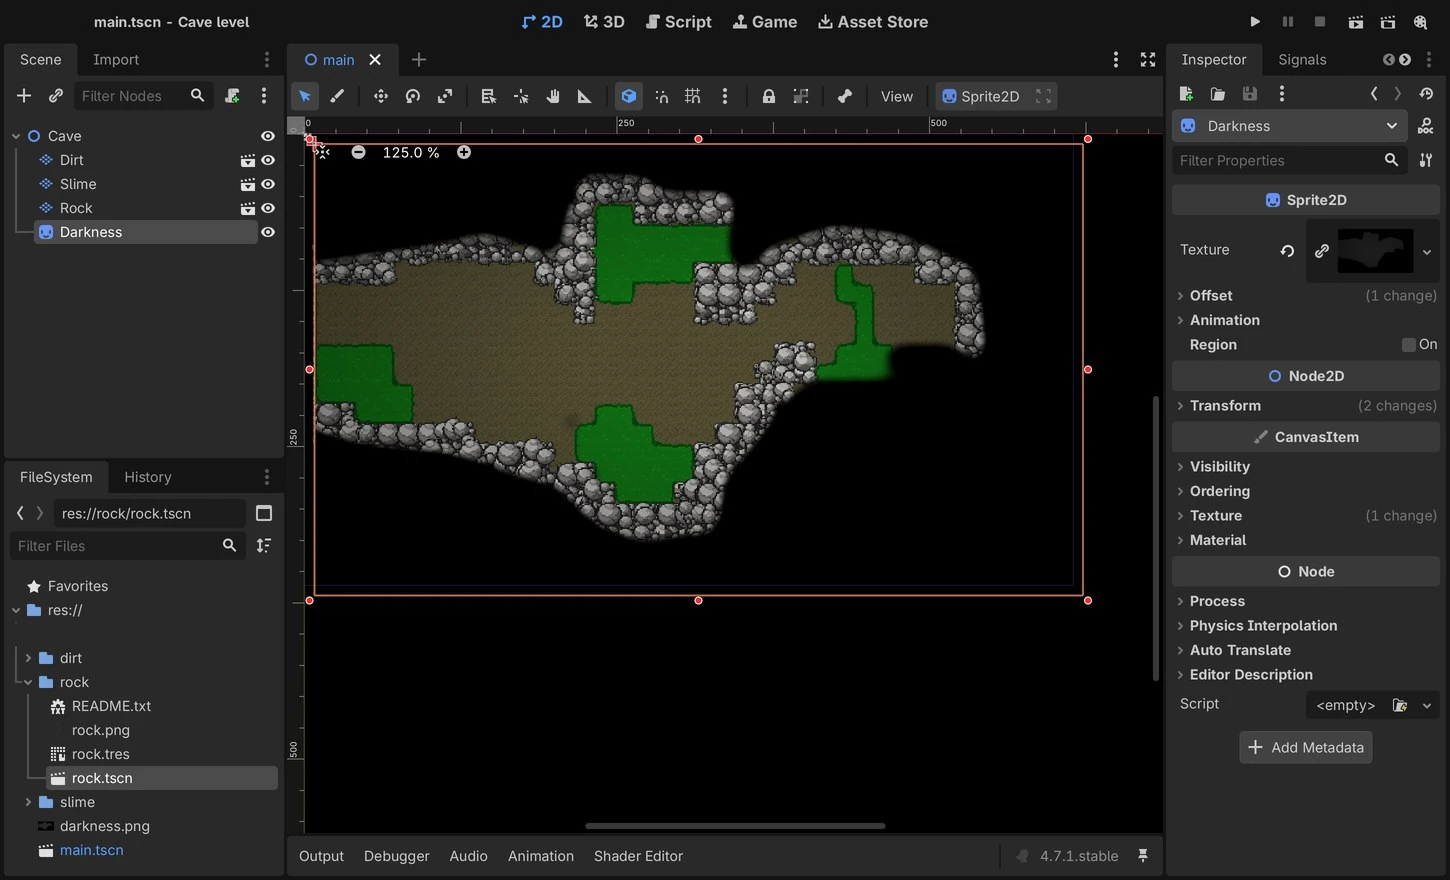
Run it
Press play. Up close, straight from the game window:
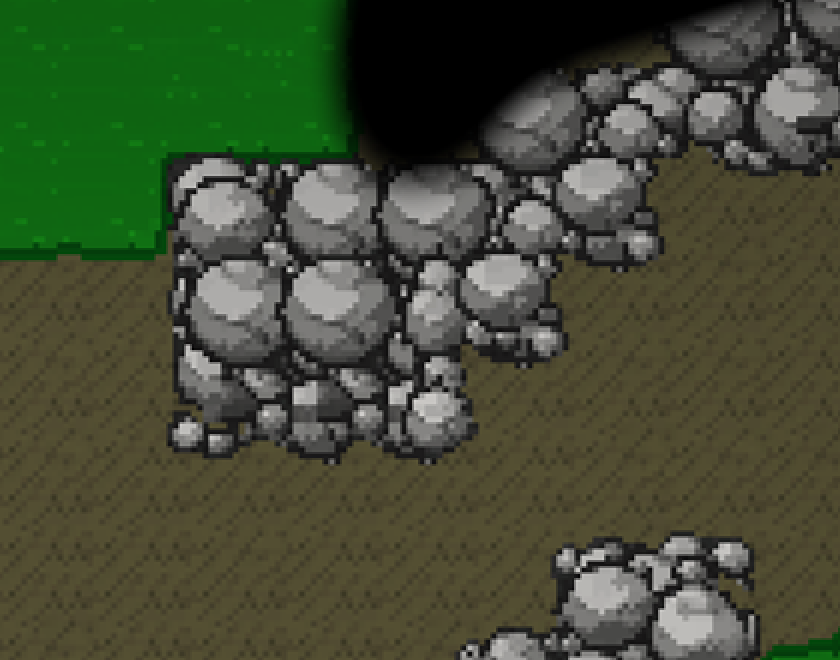
The whole project is here if you'd rather poke at a working one. Open project.godot, then main.tscn. Every layer is editable, and the Tiled versions of the three sets are in the tiled folder.
DOWNLOAD THE DEMO PROJECT (215 KB)
If the tiles look soft in your own project, that's texture filtering. The layer scenes set it for you, but the full checklist is in pixel art in Godot 4.
Step 3: Unity
Unity has no importer for autotile rules, so the smooth route is to paint in Tiled (free) and bring the map in with SuperTiled2Unity (free).
- On each result press ATLAS and choose Tiled (autotile wired). Each zip has a
.tsxand a.png. Unzip them next to each other. - In Tiled: File > New Map, orthogonal, tile size 16 x 16. Add the three tilesets with Map > Add External Tileset.
- Make one tile layer per material. Pick the Terrain Brush (T), choose the terrain in the Terrain Sets panel and paint. Same 2 tile rule as above.
- Save the map (
.tmx) in the same folder. - In Unity install SuperTiled2Unity (Package Manager, add from git URL, see its GitHub page), then drag the whole folder into
Assets. The map imports as a prefab you can drop in a scene. - In the importer set Pixels Per Unit to your tile size, and set the sprite Filter Mode to Point so the pixels stay sharp. More on that in pixel art in Unity.
Characters and monsters
Use Text to Sprite at size Small with one short line each ("armoured warrior holding a sword", "round green slime monster") and the same style note on all of them, for example "old-school top-down MMO RPG sprite, high three-quarter view, muted colours, dark outline". Turn on Rotation for the four facings and send a sprite to Animate for walk cycles. Prompting for game sprites goes deeper.
What it costs
Three tilesets at 10 credits each on Epic, so 30 credits for the level. Match colour, the test painter and every export are free. Tileset mode is part of the paid plans.
Make your own set
One prompt per material. Edges, corners and engine files included.
OPEN TILESET MODE Got stuck or want a different look? Ask in the Discord.